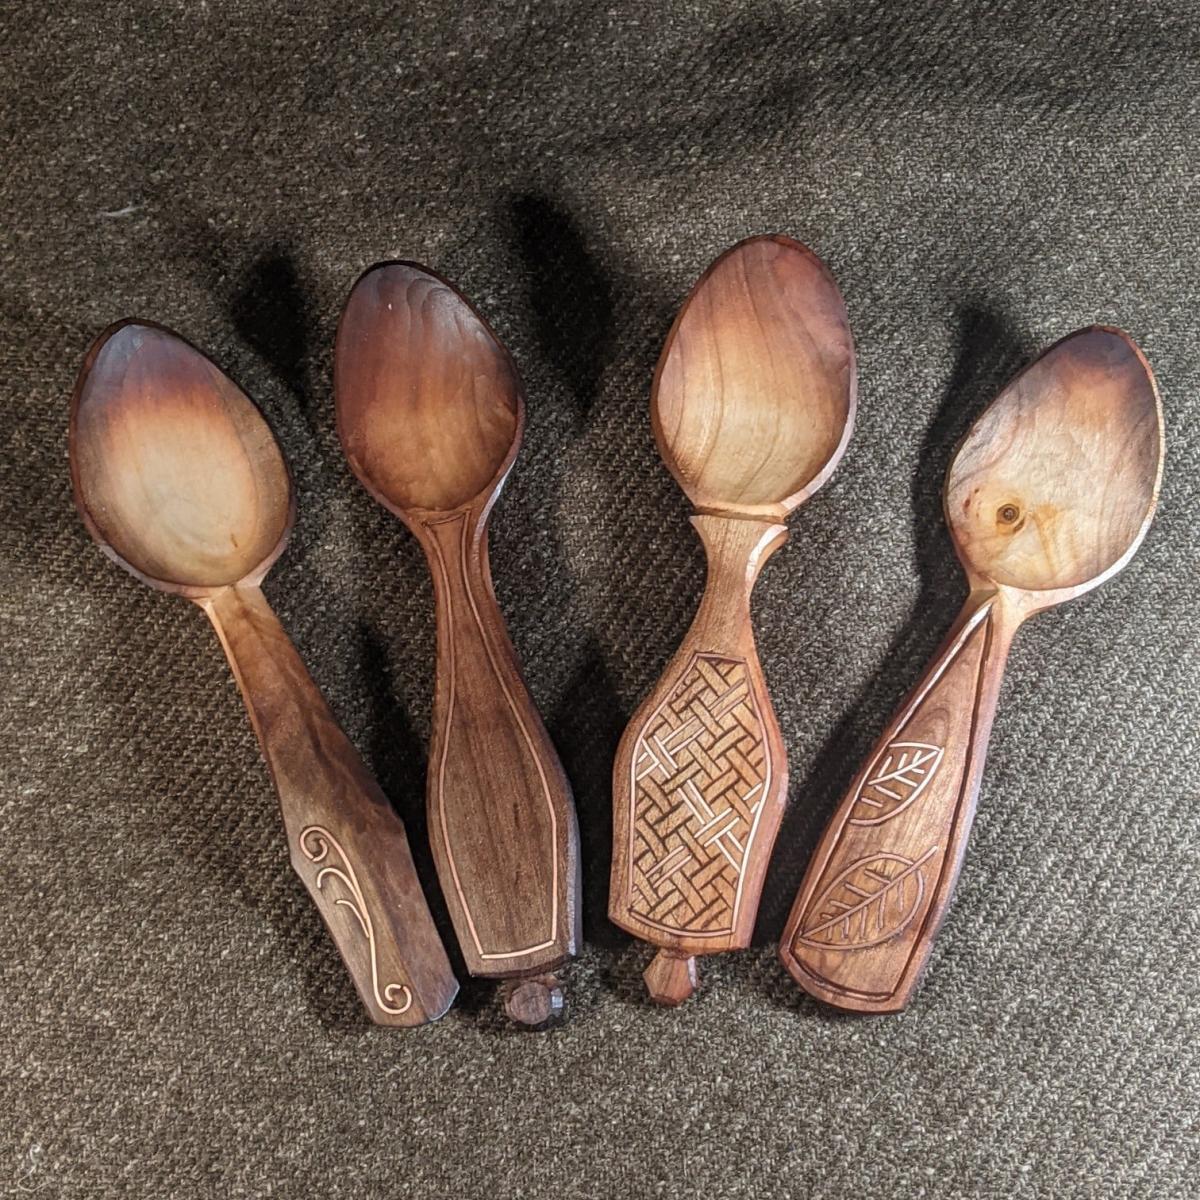
Chiron’s first 4 inlayed spoons.
One great-looking and fun way to decorate spoons (and woodworking in general) is with metal inlay. Chiron Turner of Centaur Woodworking (a friend and carver from the facebook group “Spoon Carving, Green Woodworking, and Sloyd”) recently shared their experiences trying out this technique on a series of spoons for the first time, using copper wire inlay on 4 spoons made from Cherry wood and then baked.
Inlaying is a time-tested (it is thousands of years old) decoration technique in woodworking, and consists of cutting out a section of wood and literally “laying in” and attaching a contrasting material - be it wood, metal, tile, stones, or almost anything else. It is a relatively simple technique that allows for limitless creative possibilities!
Chiron is one of the carvers and turners I look to for new techniques and inspiration, especially in relation to finishing and decorating, and so I reached out to ask if we could share their spoons and process with you all.
The process itself is again relatively easy, good for beginning carvers to take a stab at (pun very much intended, apologies).
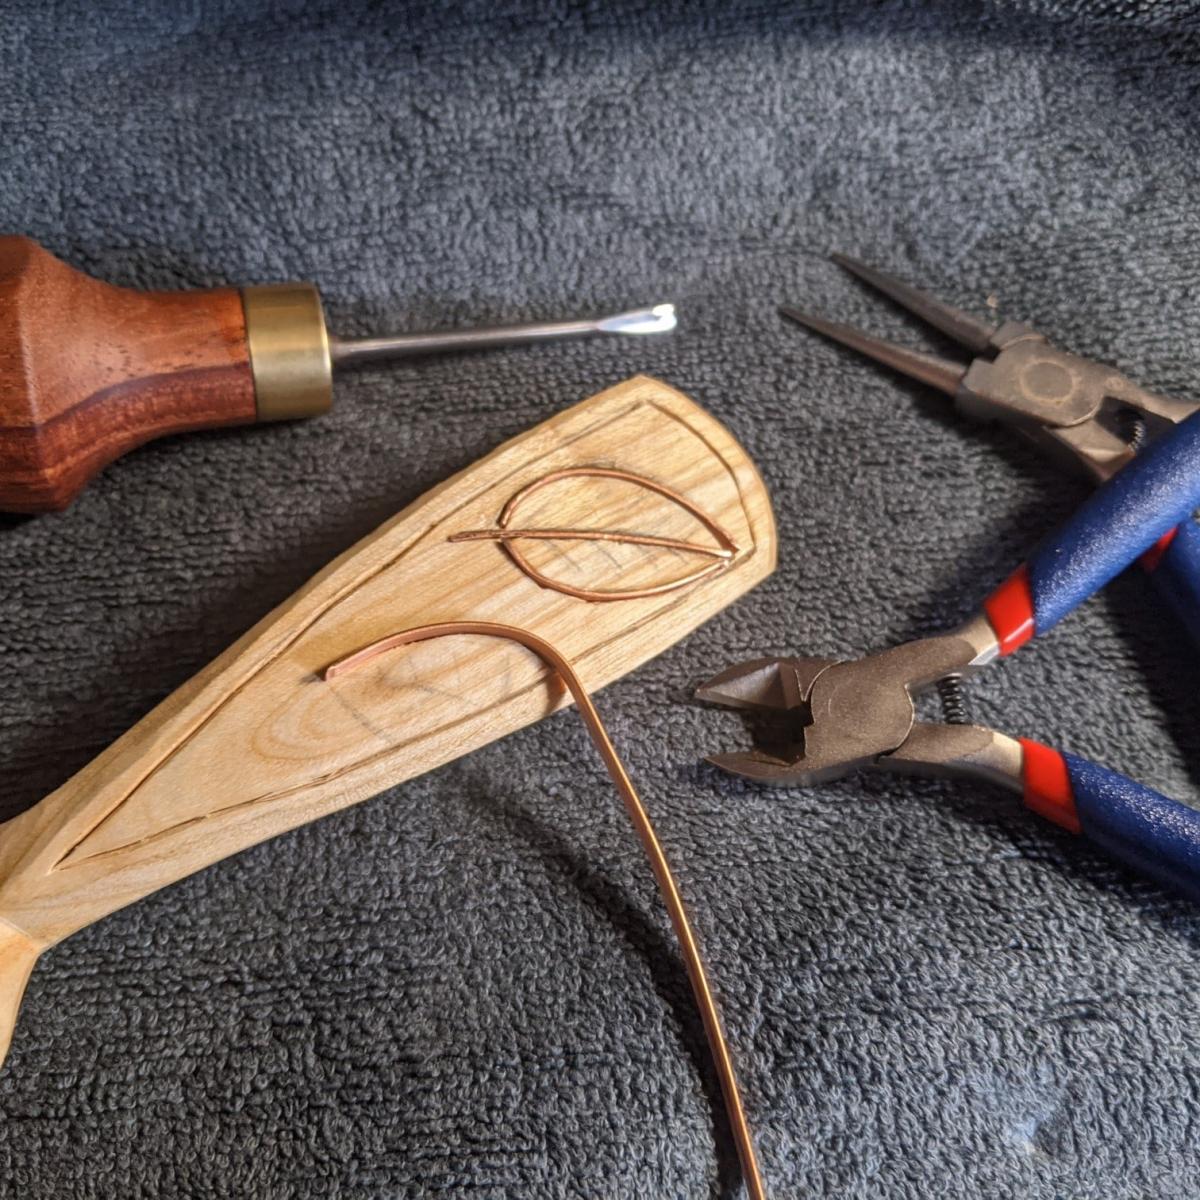
First cut or gouge a line into the wood - Chiron used a small “chisel like tool” they made from some 3 mm round High Speed Steel pictured above. You want the cut to be relatively deep depending on the wire you are using - for these spoons Chiron’s cuts were just over 2 mm in depth.
You then need flat copper wire - you can either hammer out some round wire or buy flat wire like shown in the photo. For these spoons Chiron used 3 mm x 0.6 mm wire.
Before cutting the wire, bend it to the shape of the cut in the wood as best you can, and partially push it into the cut. Then snip off the wire as close to flush as possible.
Next is the fun part - bash it in the rest of the way with a hammer! For smaller pieces you can use pliers or something similar to hold the copper in place while hammering.
If done well and the copper is hammered in deep enough, it shouldn't come back out again. There were some gaps on either side of some of the copper pieces on these first attempts, and so Chiron added a drop of super glue to hold them in place as needed.
Lastly, use a metal file to file any copper that's sticking up down to the level of the wood. The spoons were then sanded up to 1500 grit to get them nice and shiny.
Now let’s take a look at how the first 4 attempts at inlay worked out and much thanks to Chiron for sharing these, including mistakes and lessons learned.
These are Chiron’s first 4 attempts at inlaying spoons. A great first try, and I love the variety of ideas and designs here. Let’s take a closer look at each spoon and the process involved.
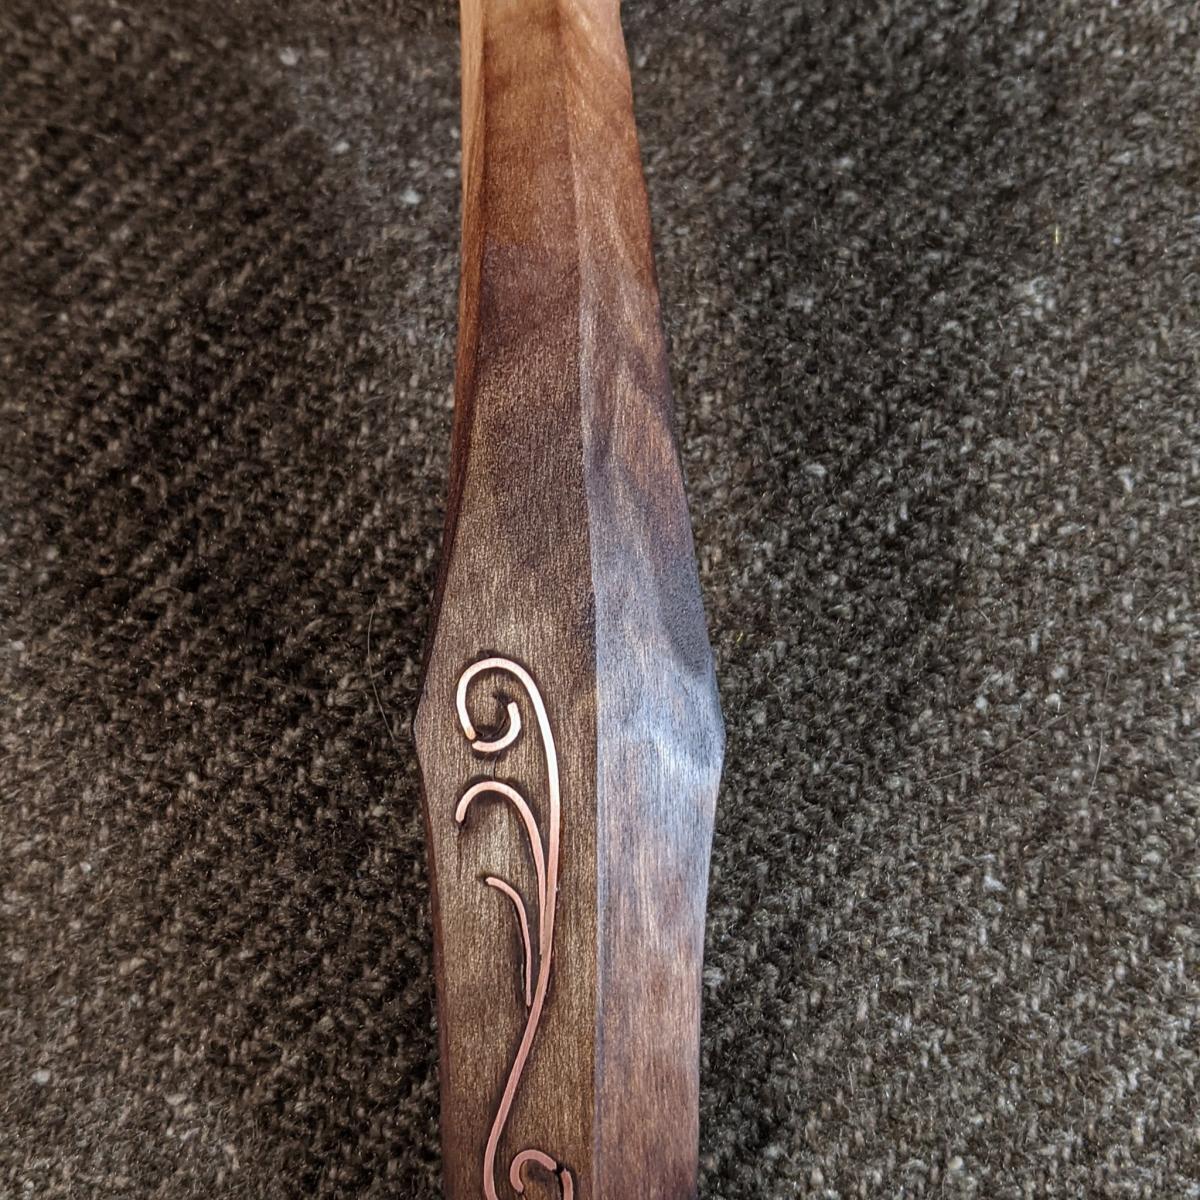
This was Chiron’s first attempt. Right off the bat they realized that the copper they used was pretty stiff, and in hindsight they could have softened it first with a blowtorch for easier handling. The hardness made it difficult to bend the tight curls, which is why the curls are done in three separate pieces here.
Both the shape of this spoon and the baking worked really well, giving it a look that pops, especially around the bowl. Baking spoons is one way of finishing them - similar to shou sugi ban (Japanese fire finish) it removes moisture from the wood, hardening and protecting it, and giving it a darker more textured color. You can play with different temperatures and times in the oven - but the process is pretty much just that, throw the spoon in the oven and bake! As with all things, there is debate over baking before oiling or vice versa, how long and at what temperature to bake, etc. As always, I recommend taking a look at some of the leading opinions out there, and then have some fun trying it out yourself.
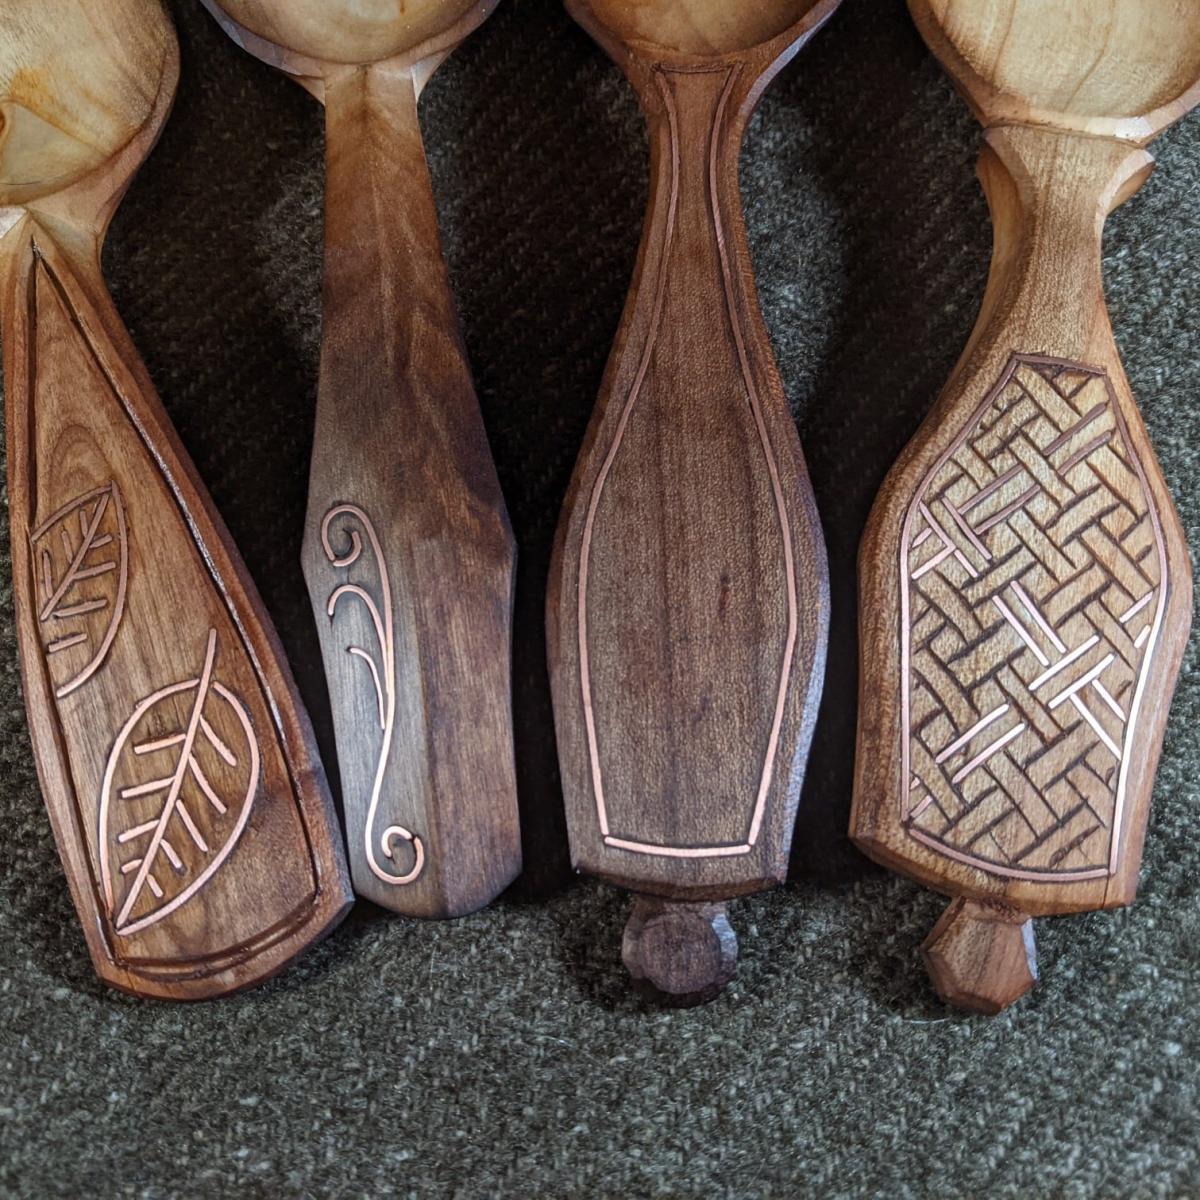
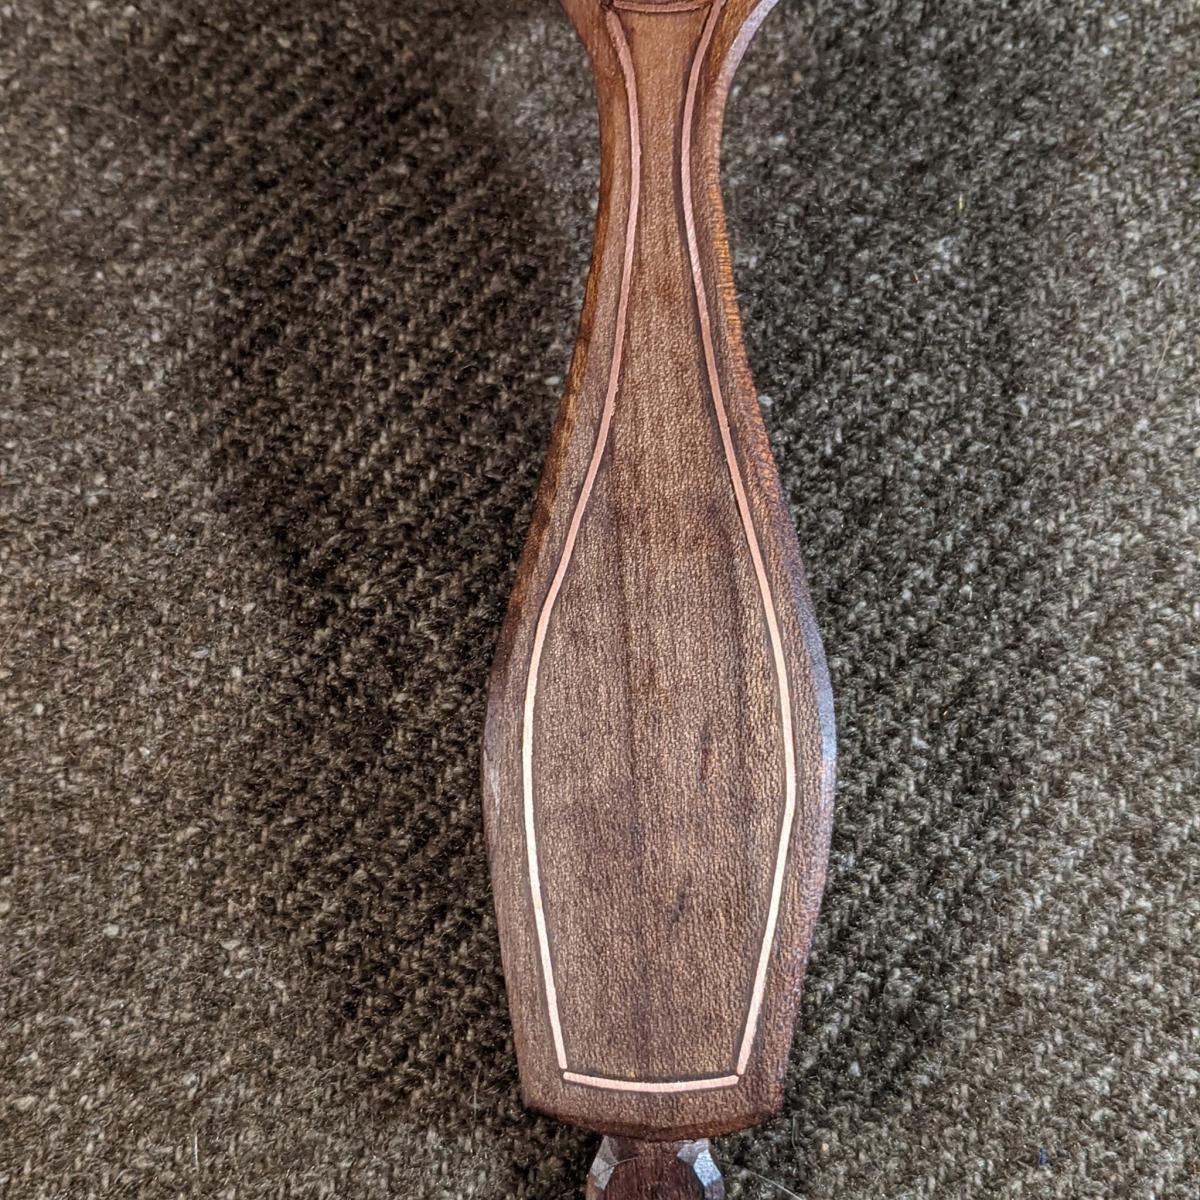
Spoon number 2. This spoon features a simple copper border, and with this one Chiron learned that really long strips can be harder to inlay than small pieces - as they hammered one section in, already hammered sections kept popping out at the other end. Personally, this is my favorite inlay of the 4. I really like the simple look of the copper border against the darkness of the baked cherry.
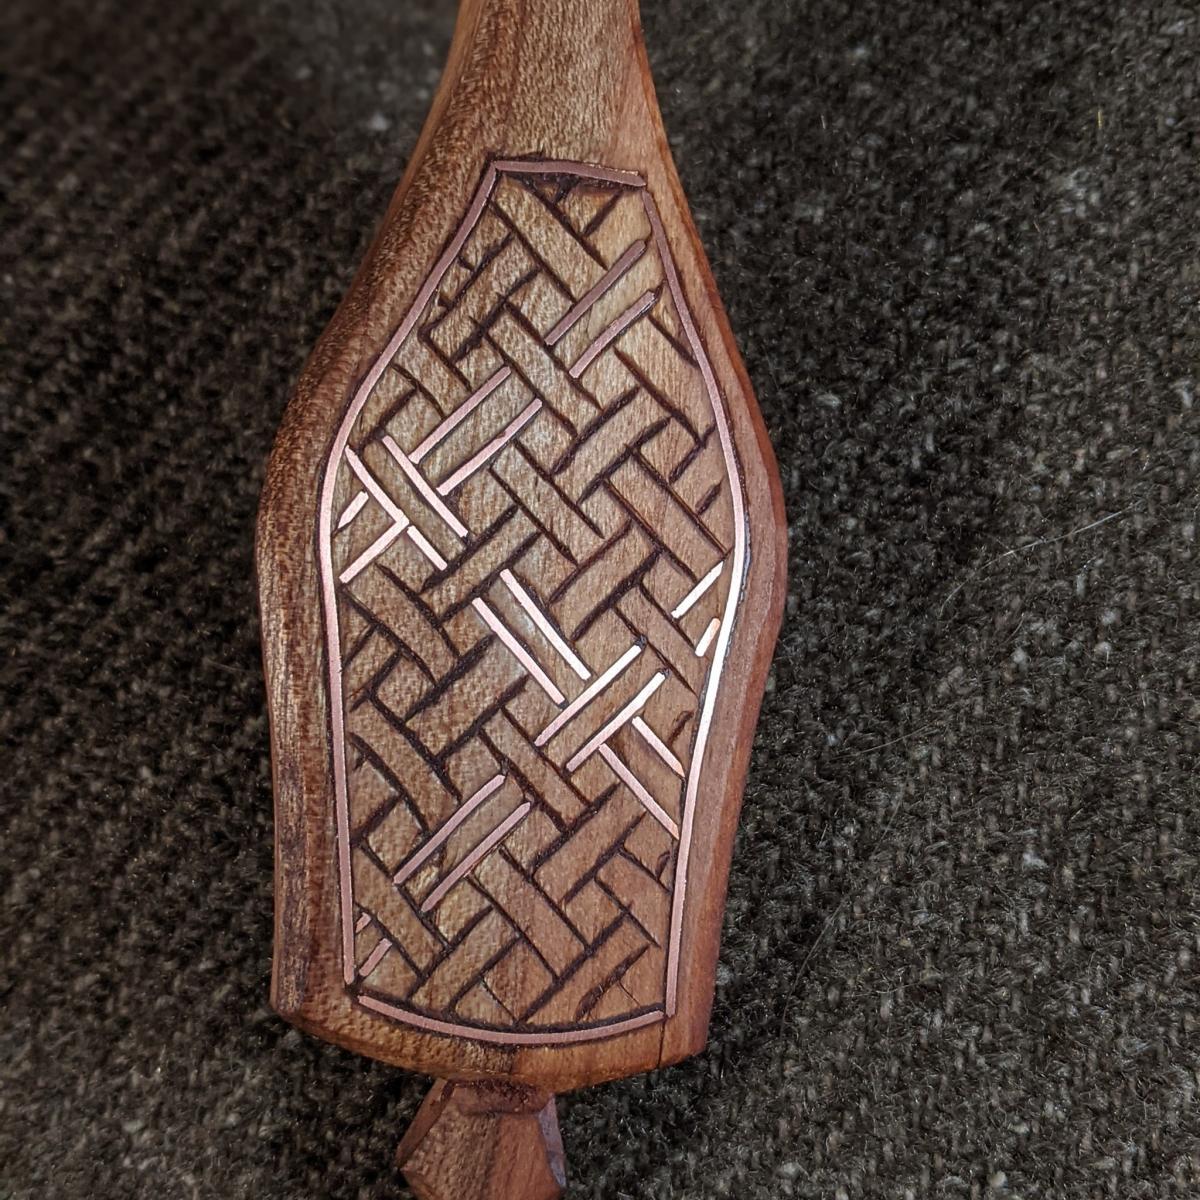
Spoon #3 was a test to see how well copper and kolrosing complimented each other visually, featuring a copper border and 3 copper basket weave lines. Kolrosing is a technique of cutting decorative lines into wood and then rubbing colored powders (coffee, cinnamon, paprika, etc.) into the cuts as decoration. The basket weave here is a very common kolrosing design.
Chiron liked how this turned out, and says it looks better in person than the photo shows. They are going to try another like this with only a copper border around the kolrosing. Additionally, they want to try different metals for the inlay, maybe a copper border with a silver or brass wire inlay for the pattern.
Another key lesson learned on this spoon - don't try to hammer a 3mm copper strip into a bit of wood only 5mm thick. Unsurprisingly in hindsight the wood split (on the bottom right corner down the copper line). Nothing a bit of superglue and a clamp couldn't fix, but next time they will do the copper first before fully thinning out the wood.
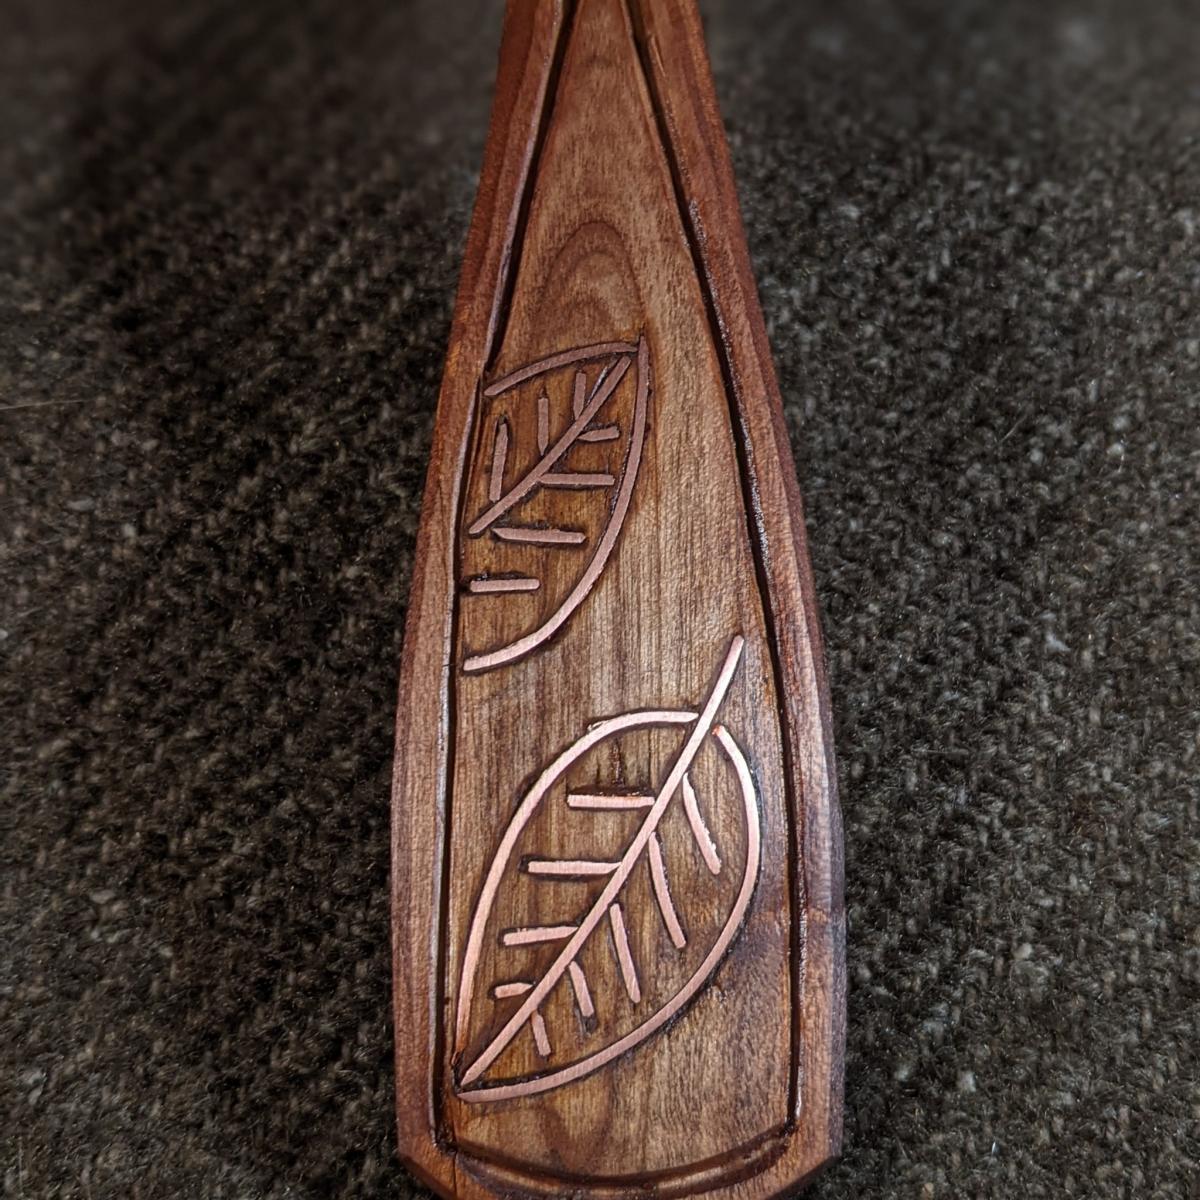
Last but not least, spoon #4.
The more medium sized pieces of copper used went in easiest on this one, they didn't pop out at the opposite end you're hammering like the border strips on two of the previous spoons, and are easier to hold in place while hammering unlike the smaller pieces. Chiron feels that this more minimalist style compliments the copper best as well, with simple shapes and curves.
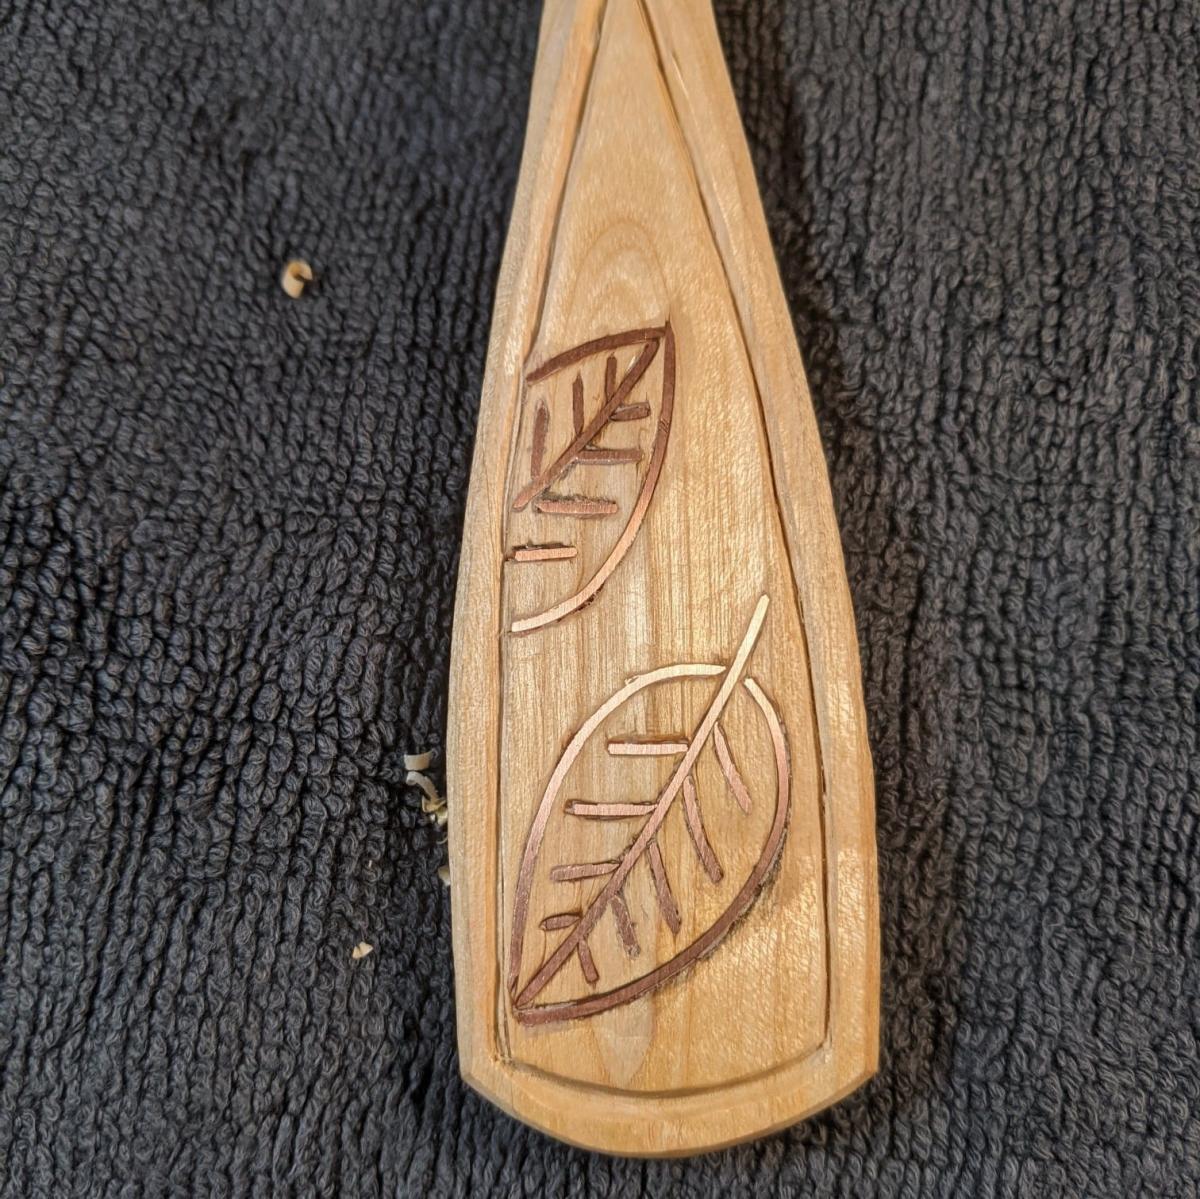
The same spoon before baking as a contrast.
Big thanks again to Chiron Turner of Centaur Woodworking for sharing their work with us. And if you dear readers have any questions or suggestions on inlaying spoons, please share them below, as well as pictures or stories of your attempts at this.
Join the conversation
03/25/2021 K. Benton
Perhaps this is already well known to most readers here, but in case it's helpful to anyone, do note that copper (as well as brass and most related alloys) will work harden as you bend and form it. Particularly if there's a piece that's been tweaked in shape quite a bit, one that's been hammered somewhat and then fallen out, or if it was pretty hard to begin with (not all copper is annealed when you get it after all), it may be worth annealing it before attempting to inlay it (or inlaying it again). Doing so is easy if you've got a regular propane torch -- heat the copper up until it's more or less just begun to glow red hot, and then quench it in water (converse to steel, this maintains the softer, annealed state).
04/01/2021 Rachael Lauritzen
What a delightful idea! Thank you for walking us through the process, it was very insightful.


 Joel's Blog
 Built-It Blog
 Video Roundup
 Classes & Events
 Work Magazine